

EZCMS ATKey Integration
EZCMS is the Entra ID passwordless onboarding tool to support self-service onboarding for Entra CBA and FIDO2 security keys.
EZCMS is developed by Keytos to simplify user identity and security key management in one platform. From user onboarding to credential revocation, streamline the entire security key lifecycle for Entra ID passwordless authentication, purpose-built for IT admins.
On This Page
Compatibility
ATKey.Pro
Available for FIDO2 authentication.
ATKey.Card NFC
Available for FIDO2 and Smart Card PIV authentication.
Entra ID
EZCMS integrate with Entra ID as IAM
How to Distribute ATKey.Card NFC with Keytos EZCMS
Requirements
EZCMS installed and properly configured - Getting Started with EZCMS
Entra ID properly configured - Register Entra ID Domain
Card reader with a contact mode - verified readers list
ATKey.Card NFC supporting both FIDO2 and PIV - Check your card compatibility
Register ATKey.Card NFC to EZCMS
Admin privileges are required by the EZCMS account who performs the registration and distribution.
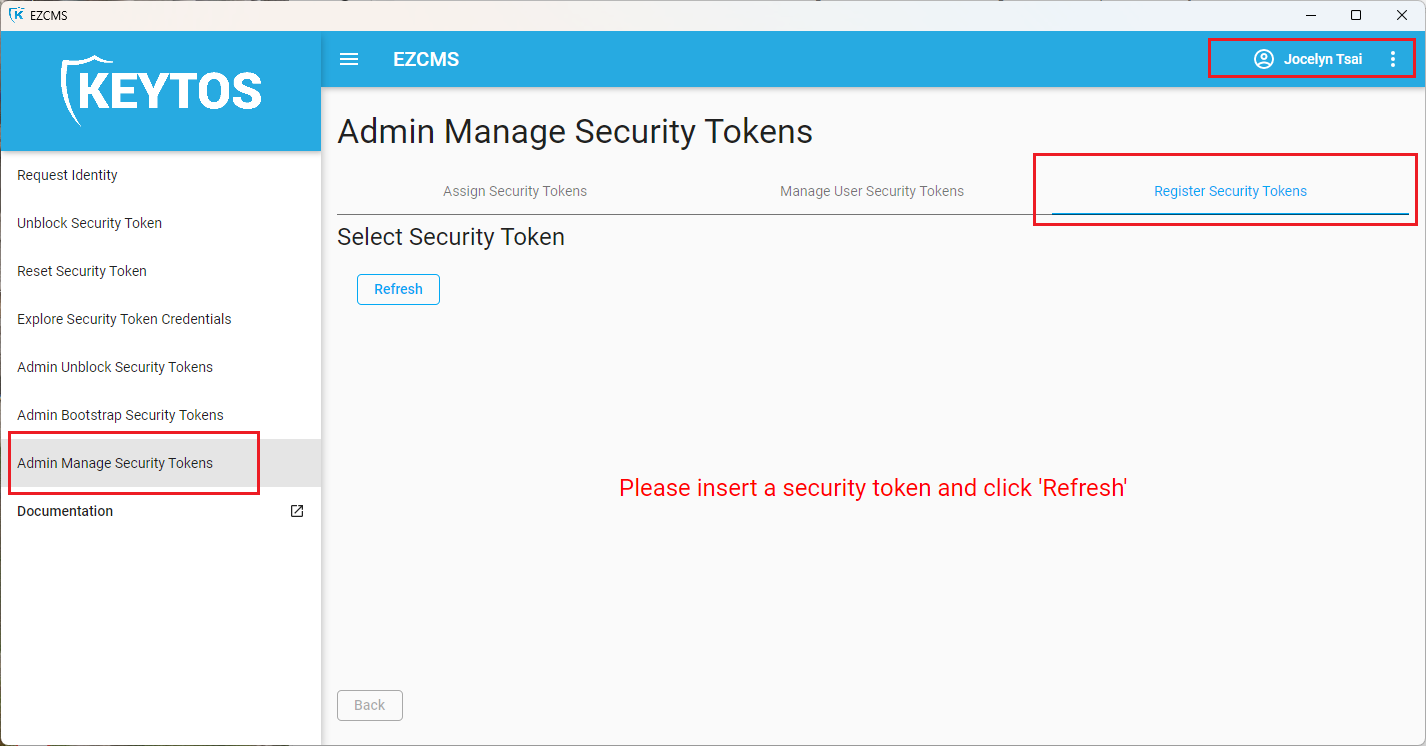
Open EZCMS client application, and login as an administrator
Select the “Admin Manage Security Tokens”, then the “Register Security Tokens” tab
Connect the card with the card reader, and click “Refresh”
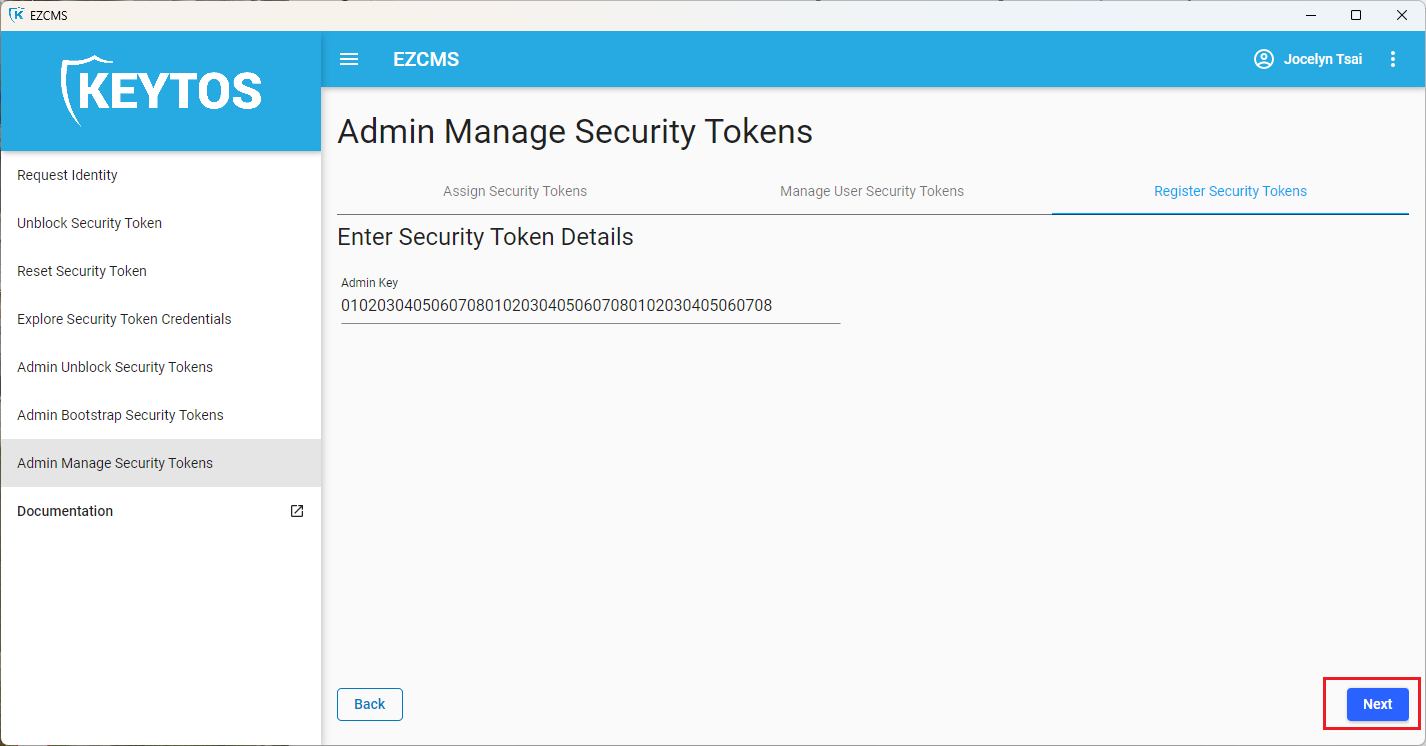
Select the ATKey.Card NFC you want to register
Click “Next” with the default administration key (010203040506070801020304050607080102030405060708)
This ATKey.Card NFC is now registered in the inventory and can be assigned to a user
Request a ATKey.Card NFC for a User
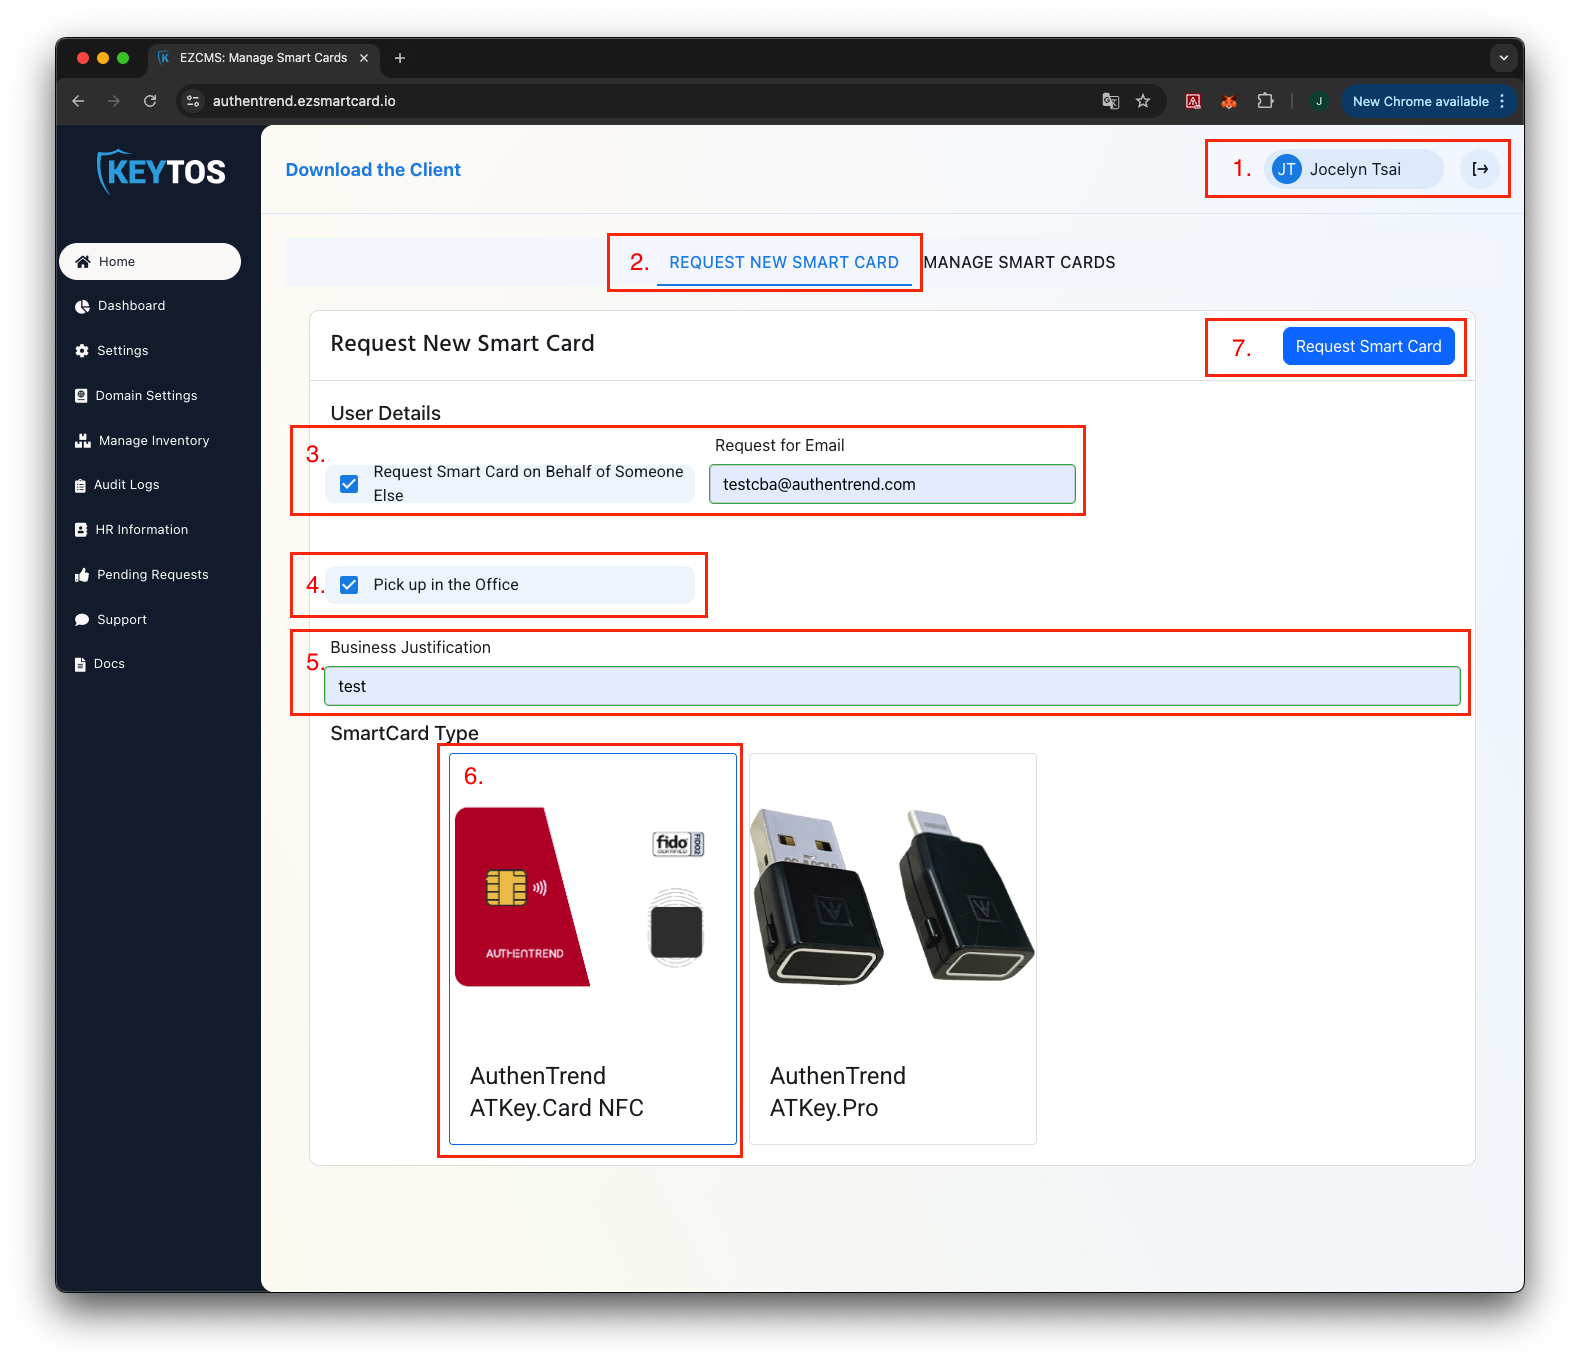
Go to organization’s EZCMS portal and login with Entra ID account
Select the “Request New Smart Card” tab.
If requesting on behalf of someone else, click the “Request Smart Card on Behalf of Someone Else” checkbox, and enter the user email
Select Pickup in office, or enter the address
Enter business justification (this will be shown to the approver when admin receive the request)
Select the ATKey.Card NFC
Click the “Request Smart Card” Button
Assign a ATKey.Card NFC to a User
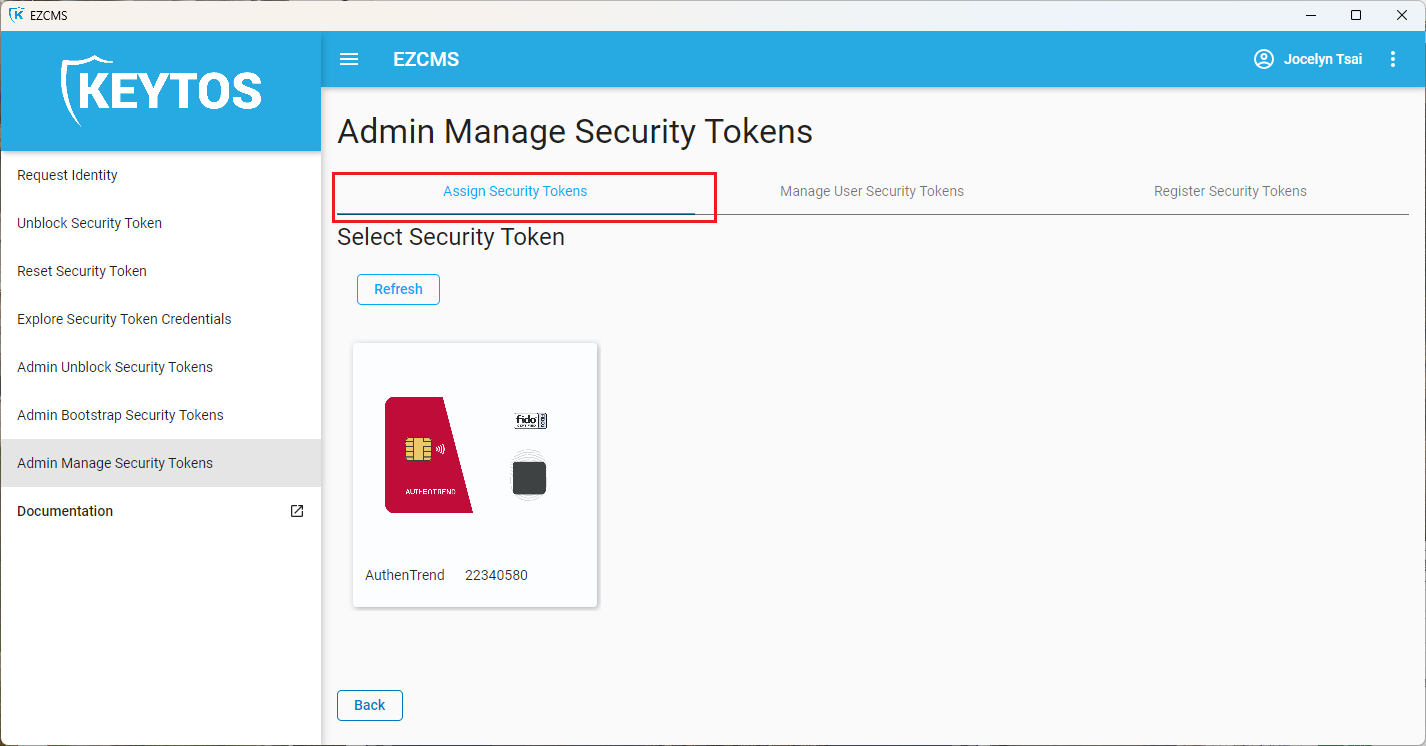
Open EZCMS client application, and login as an administrator
Select the “Admin Manage Security Tokens”, then the “Assign Security Token” tab
Select the “Security Token Request” from the list
Select the ATKey.Card NFC want to assign (connect the card with the card reader, and click “Refresh” if the card is not connected)
Enter shipping info if required
Click “Next” on the bottom right to assign the card to the user
The ATKey.Card NFC is now assigned to the user
User Requests Identity with the Assigned Smart Card
Once the user receives their registered smart card they can apply for a digital identity through EZCMS portal.
Open EZCMS client application, and login
Navigate to “Request Identity”
Select “SSO Login” and click Next
Select the domain and account want to create an identity for
Connect the ATKey.Card NFC to the reader and computer
Follow the instruction to setup New PINs
Follow the instruction to enroll fingerprint