

Versasec ATKey Integration
About vSEC:CMS
vSEC:CMS is Versasec's enterprise-grade Credential Management System (CMS), used to centrally manage the full lifecycle of hardware credentials such as smart cards and USB security keys — from issuance and activation to PIN management and revocation, all from a single system.
The On-Premise edition is installed on the organization's own servers. Compared with the cloud edition (vSEC:CLOUD), it is better suited to organizations with strict data sovereignty requirements or
air-gapped environments. vSEC:CMS supports both PKI/PIV and FIDO2 credential types, and integrates with existing identity infrastructure such as Active Directory, Hybrid AD, and Certification Authorities (CAs).
AuthenTrend ATKey.Card NFC and ATKey.Badge have both been validated for compatibility with vSEC:CMS and can be fully managed through it.
Further reading: vSEC:CMS product page, Enterprise Credential Management overview
Prerequisites
An ATKey.Card NFC or ATKey.Badge
A card reader (needed for ATKey.Card NFC if your computer does not have a built-in NFC/smart card reader)
SecurityKey Desktop App installed on your computer (on Windows, run it as administrator to enable full functionality)
The vSEC:CMS Admin application installed and already configured to connect to the backend Server; if it is not installed yet, see the official Install Admin Application guide
Active Directory user accounts with the corresponding Credential Template already set up in vSEC:CMS
Further reading: Install Admin Application, Configure Credential Template
ATKey × vSEC:CMS (On-Premise) Setup & User Guide
Part A covers configuration by a vSEC:CMS Administrator/Operator. Part B covers day-to-day use by the end user.
Part A: Admin Setup & Configuration Guide
The following steps are performed by a vSEC:CMS Operator/Administrator to assign and activate a PIV credential on an ATKey before it is handed to the end user.
Step 1: Assign a PIV Credential in vSEC:CMS Admin
Open the vSEC:CMS Admin application and sign in with your Operator account (you will need to insert your Operator credential to log in).
Connect the ATKey you want to assign, then go to the "Lifecycle" page. See also: Life Cycle Processes
From the "Use the credential inserted in" dropdown, select the corresponding reader interface. The system will automatically read the card serial number.
The card status will show as Unregistered. In the flow diagram, select "Issued" (this automatically performs both the Register and Issue steps), then choose the credential template to apply.
Click Search to open the "Find Users, Contacts, and Groups" window, enter the user's name, click Find Now, select the user this card should be assigned to, then click OK.
Click Execute to start the issuance process. The system will complete Register and Issue in sequence, requesting a certificate from the Certification Authority (CA).
Once complete, the card status will change to Issued — you can confirm this in the Selected Credential panel on the right.
Select the “Active” process to activate the credential and set the initial PIN.
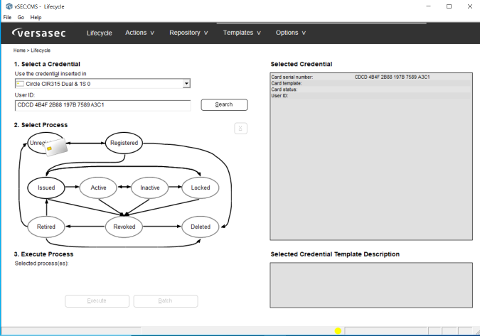
Step 1-3: Lifecycle page: select the credential and reader interface
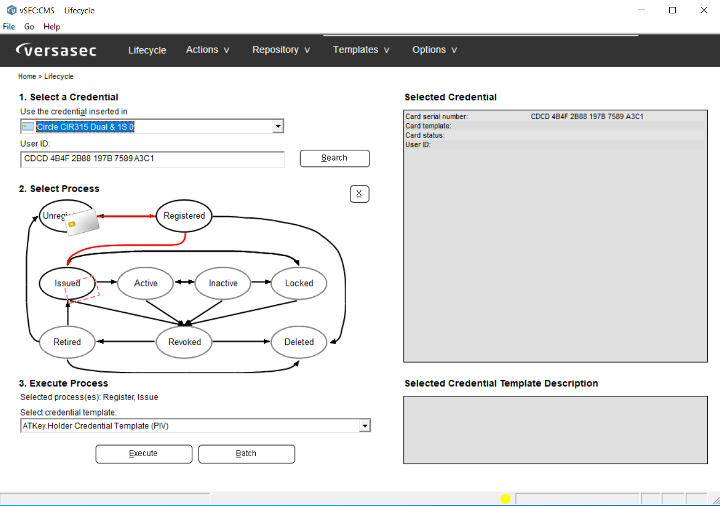
Step 1-4: Selecting "Issued" and the credential template to start the issuance process
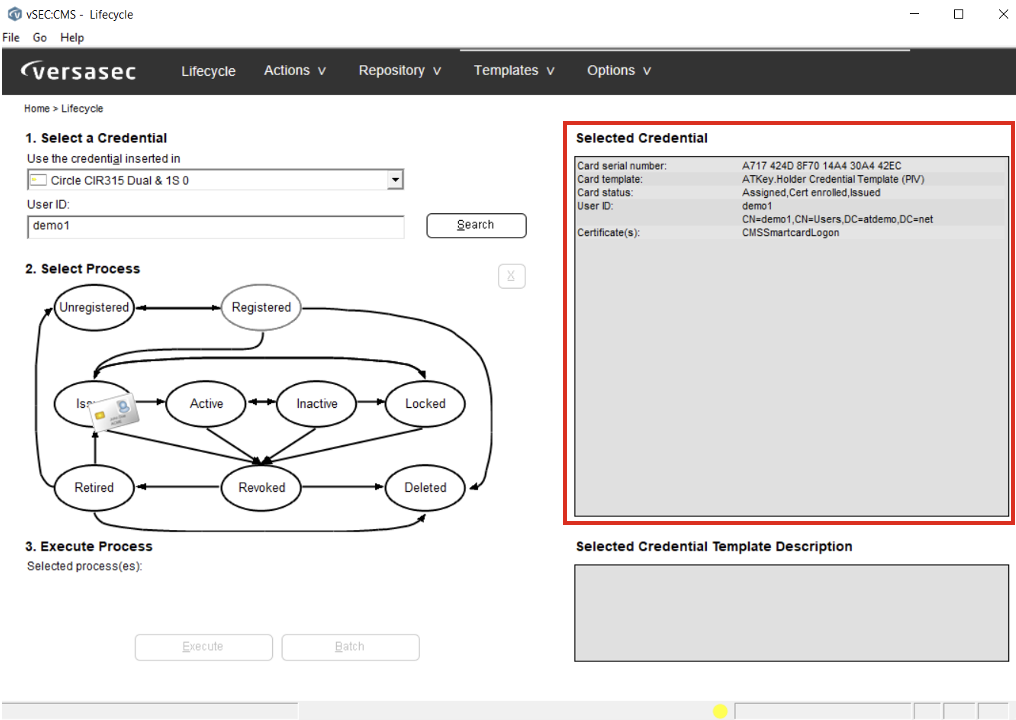
Step 1-7: Confirming card status is Issued and certificate has been enrolled
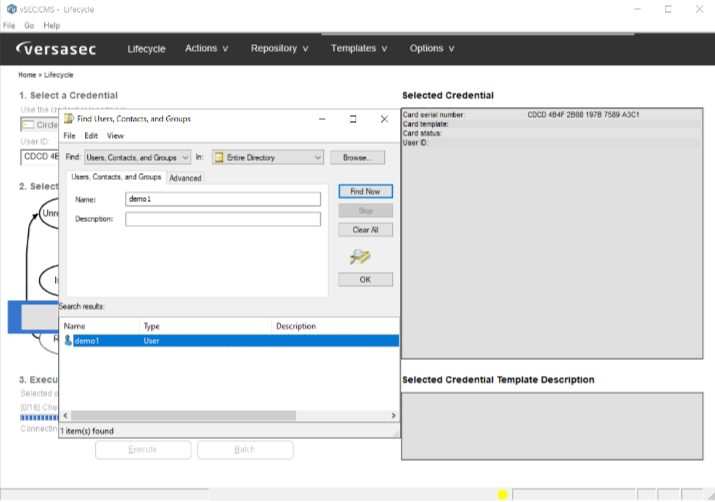
Step 1-5: Searching for and selecting the user to assign the credential to
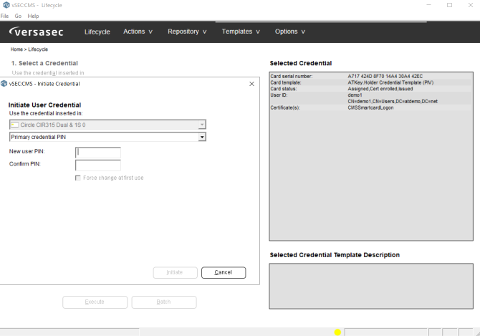
Step 1-8: setting the initial PIN directly from the Admin console
———————————————————————————————————————————————————————————————
Step 2: Enable Biometric Protection in SecurityKey Desktop app
Connect the ATKey, open SecurityKey Desktop, select the card on the left, then switch to the "PIV" tab.
Enable "Biometric protection" so the credential can be verified with a fingerprint instead of entering the PIN.
**Note: Default PIV values: PIV PIN is 123456, PUK is 12345678, and Management Key is 010203040506070801020304050607080102030405060708.
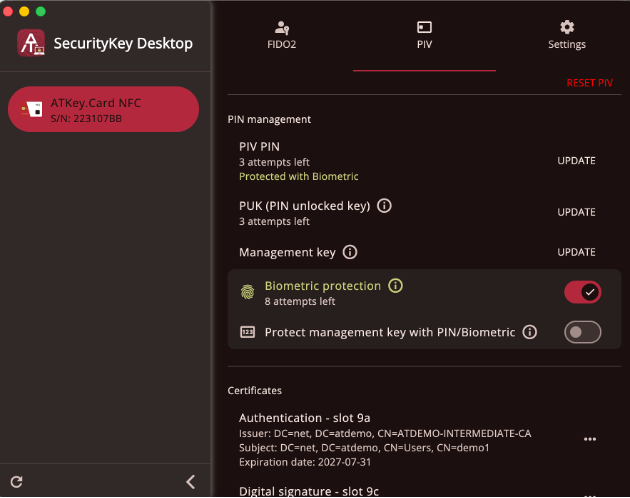
SecurityKey Desktop: enabling Biometric protection
———————————————————————————————————————————————————————————————
Step 3: Install the ATKey Smart Card Minidriver (Windows) on the User's PC
Windows requires the ATKey-specific Minidriver to correctly recognize the PIV credential on the card and use it for sign-in.
Download the ATKey Smart Card Minidriver (supports Windows 11 x64, and Windows 10 x64/x86/ARM).
- Download link: ATKey Smart Card MinidriverType "Device Manager" in the Windows search box and open it.
Expand the "Smart Card" category and locate the current reader/card device.
Right-click the device, select "Update driver" → "Browse my computer for drivers," point it to the folder where you downloaded and extracted the driver, then click Next to complete the installation.
Afterward, when a smart card verification prompt appears with the text "Enter PIN or leave it empty to verify Fingerprint" leave the PIN field empty and touch the fingerprint sensor to complete verification.
Part B: End User Guide
Once your ATKey has been set up and assigned by your IT administrator, follow these steps to start using it.
Step 1: Sign in to Windows with ATKey
On the Windows sign-in screen, select "Other sign-in options" and choose the smart card icon
(or the security key option).Insert your ATKey and follow the on-screen instructions to enter your PIN.
**Note: If your PIN is ever locked, contact a vSEC:CMS Operator to unblock it using the PIN Unblock function in the Admin or Agent application — there is no need to reissue the card.

———————————————————————————————————————————————————————————————
Step 2: Enroll Your Fingerprint for Sign-in (Windows Settings)
To sign in with your fingerprint instead of entering your PIN every time, enroll your fingerprint through Windows' built-in Windows Hello setup for your security key.
On your Windows PC, go to Settings > Accounts > Sign-in options.
Under "Ways to sign in," locate "Security key" and click Manage.
In the Windows Hello setup window that opens, click “Set up“ under Security Key Fingerprint.
If prompted, insert your ATKey, then follow the on-screen instructions — touch the fingerprint sensor several times, from different angles, until enrollment is complete.
Once enrollment is complete, you can use your fingerprint to verify your ATKey instead of entering a PIN when signing in.
After enrollment, signing in is simple — place your finger on the fingerprint sensor, then press Enter in the sign-in dialog to log in to Windows.
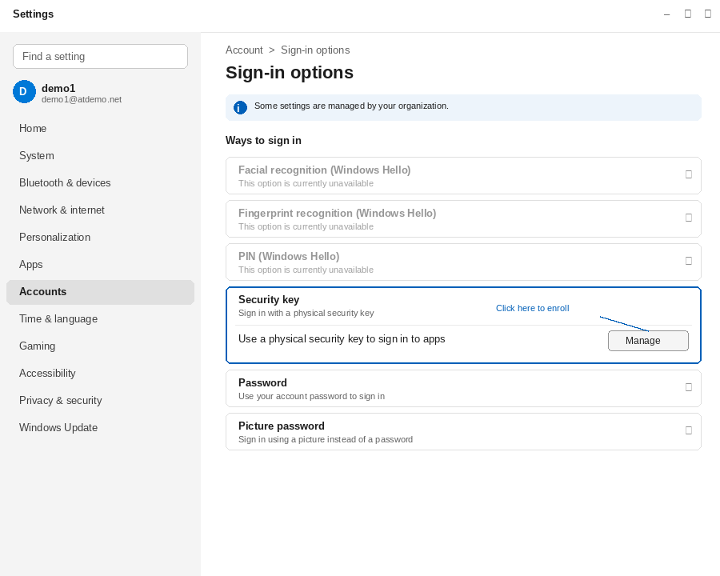
Step 2: Windows Settings — Accounts > Sign-in options: locating Security key and clicking Manage
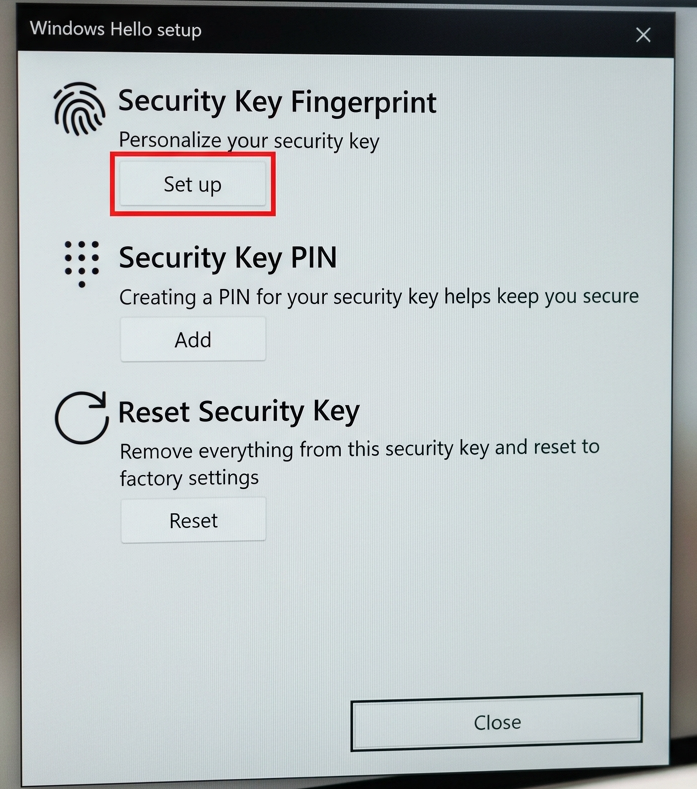
Step 4: Windows Hello setup: enrolling your fingerprint on the security key
Troubleshooting & Support
vSEC:CMS cannot find the credential template or the user: contact your IT administrator to confirm the template settings and that the AD/Entra ID directory connector is working correctly.
Fingerprint not recognized during sign-in: re-enroll your fingerprint from Settings > Accounts > Sign-in options > Security key > Manage, and make sure the sensor is clean and dry.
PIN forgotten or locked: contact your IT administrator or a vSEC:CMS Operator for a PIN Unblock — there is no need to request a new card.
Additional technical documentation:
Versasec Support Center (support.versasec.com)
More about How to set up ATKey.Card NFC: authentrend.com/atkey-card-nfc-start