SecurityKey Desktop User Guide
SecurityKey Desktop is the prime tool to manage your AuthenTrend security keys.
Where ATKey.LCM allows to register, deploy, and manage batches of keys SecurityKey Desktop focuses on the day-to-day fine tuning of the ATKey experience for the users.
Whether you are an IT admin or a final user SecurityKey desktop gives you total control on your ATKey, the credential you store in it and its functionalities.
If you are primarily on the move and deal with ATKey.Card NFC you can opt to use SecurityKey NFC, our mobile version of this tool.


To use SecurityKey Desktop download the latest version, Windows or MacOS, and start it, run as administrator is necessary on Windows.
Plug or place on a scanner your ATKey and see it show up in the left bar. If SecurityKey Desktop does not update automatically you can push a refresh with the button in the bottom left corner.
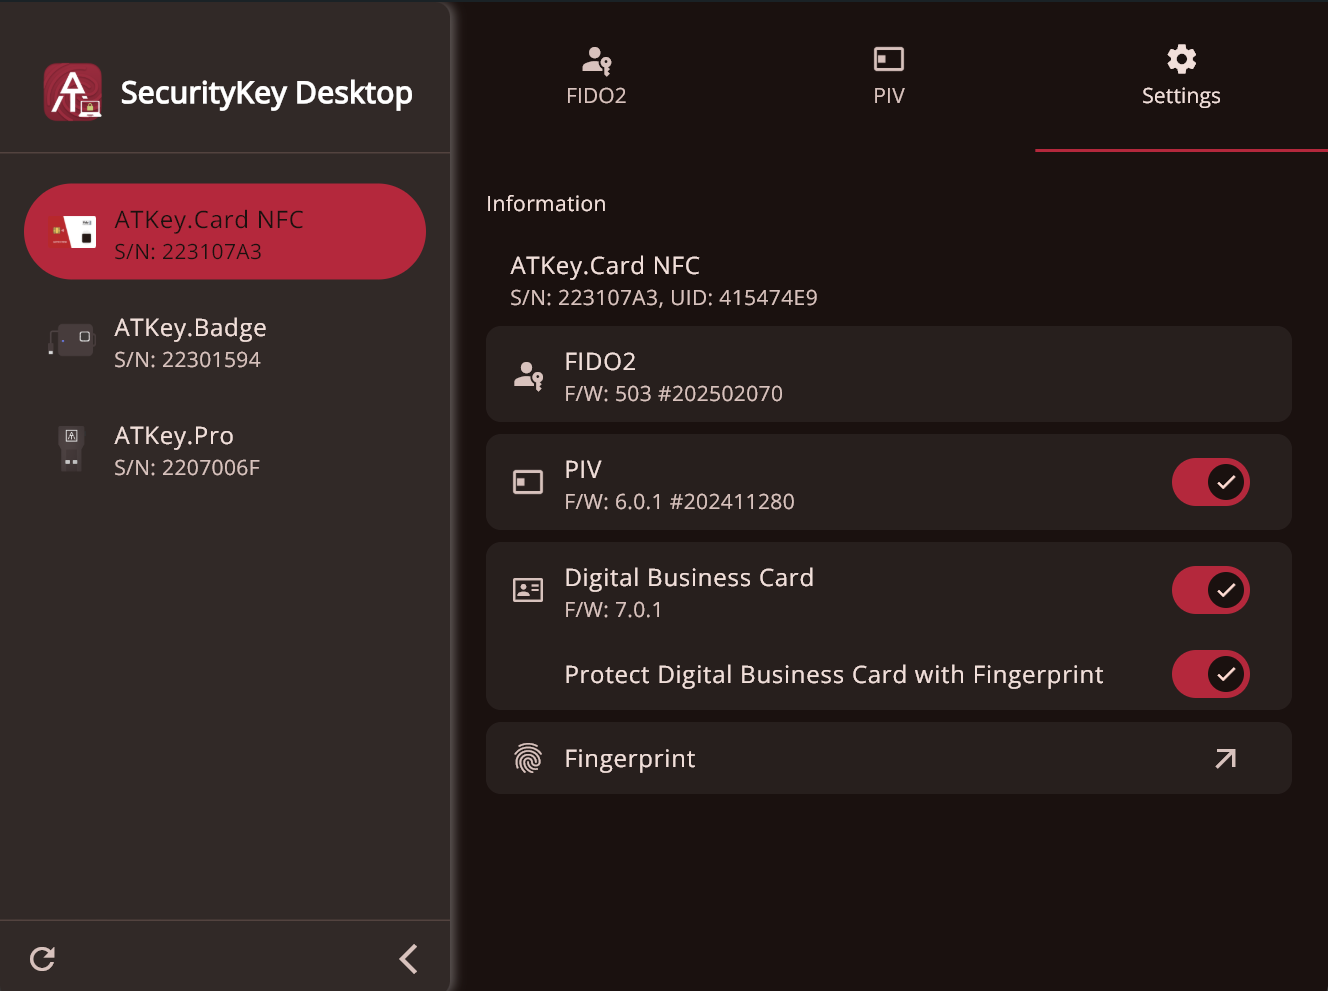
Hovering over each connected ATKey you will be able to see the serial number, firmware version for FIDO2 and PIV, and MIFARE UID associated with that ATKey. Not all ATKeys support every one of these protocols.
Depending on the available protocols only some of the following tabs:
FIDO2
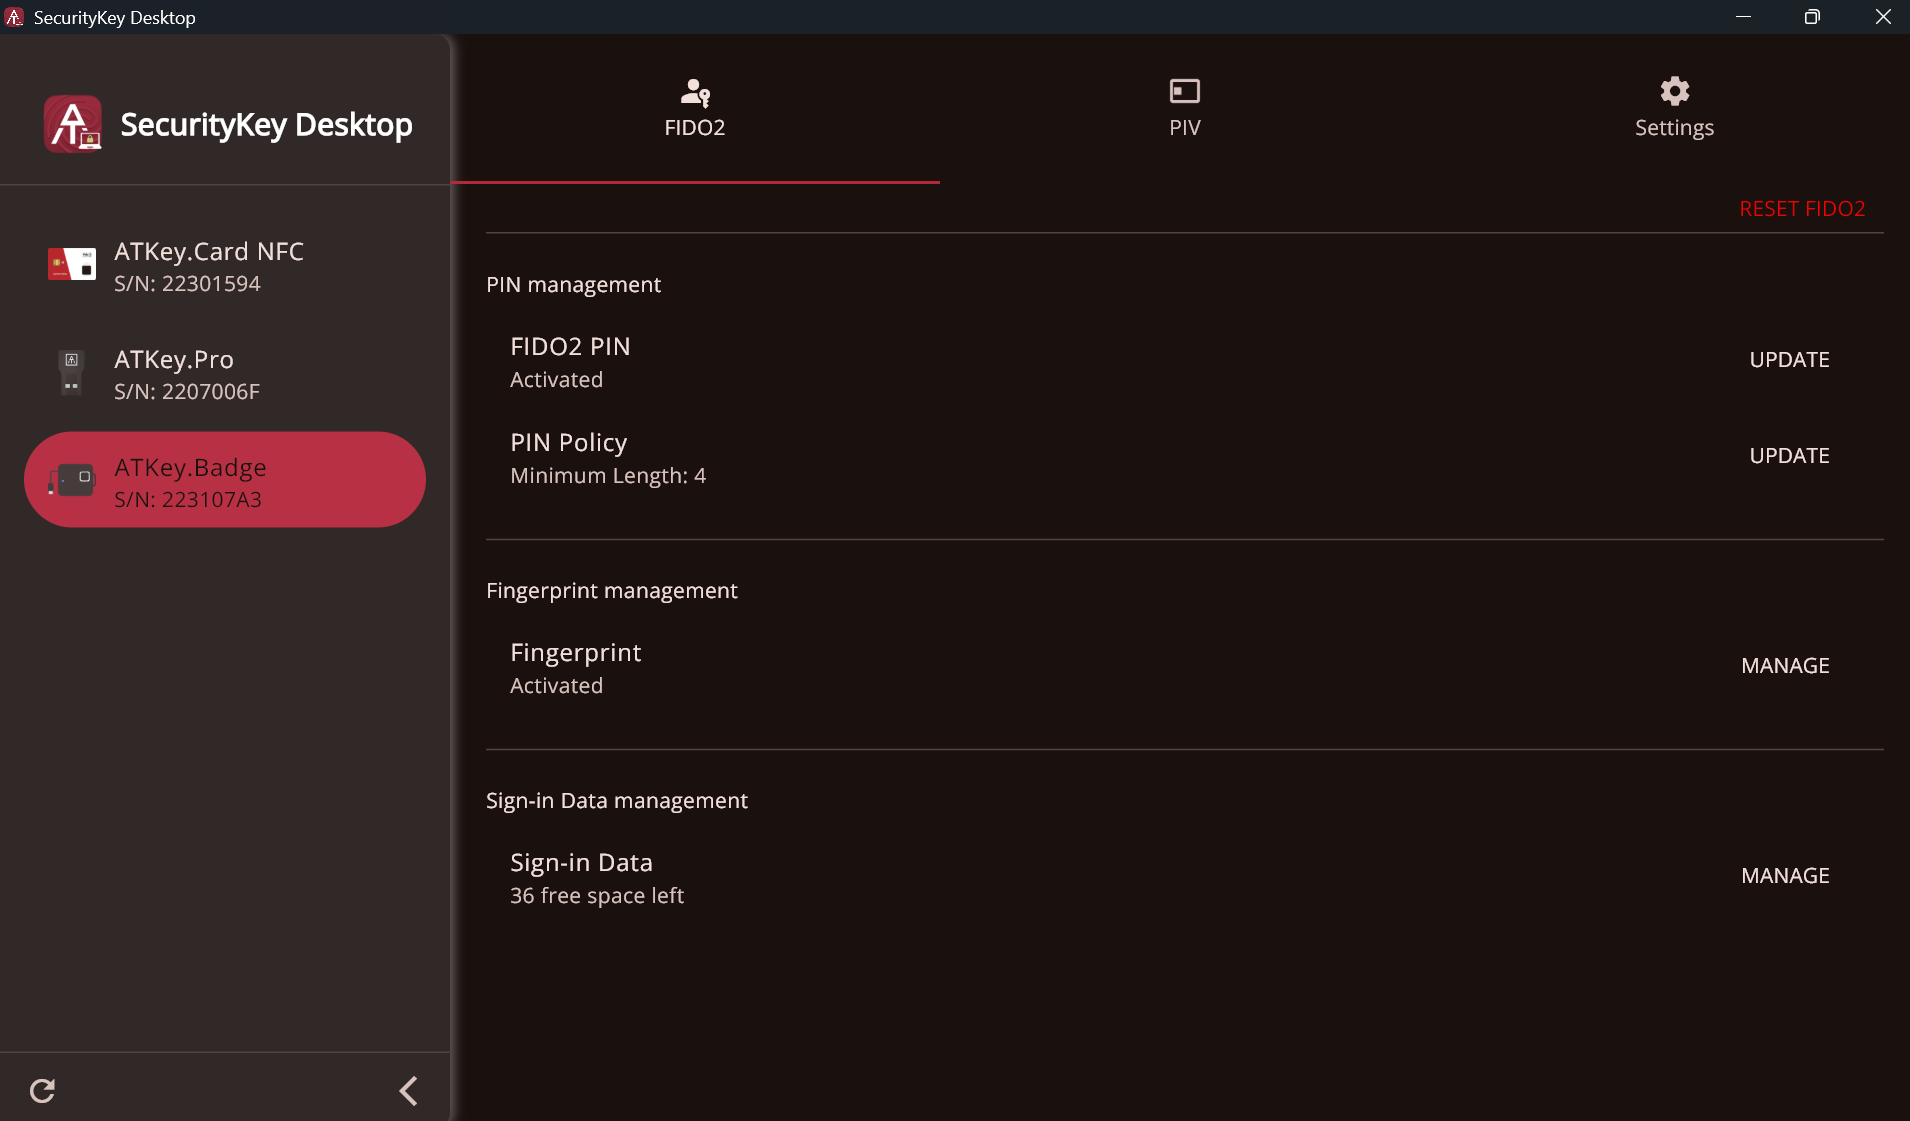
In the FIDO2 tab you can manage the PIN associated with your ATKey, changing it or creating a PIN length policy for this ATKey. You can also manage the fingerprints enrolled on this particular ATKey.
NB due to FIDO2 protocol design no operation can be performed if a PIN is not enrolled. If you are connecting an ATKey.Pro which only had fingerprint registered through Standalone Mode, you will be prompted to create a PIN.
Here you can also manage the FIDO2 credentials stored on your ATKey and in the case of ATKey.Pro you can perform a fingerprint sensor calibration or activate/deactivate the Standalone enrollment.
PIV
Only ATKey.Card NFC and ATKey.Badge are compatible with PIV, if ATKey.Pro is connected, this tab will not be available.
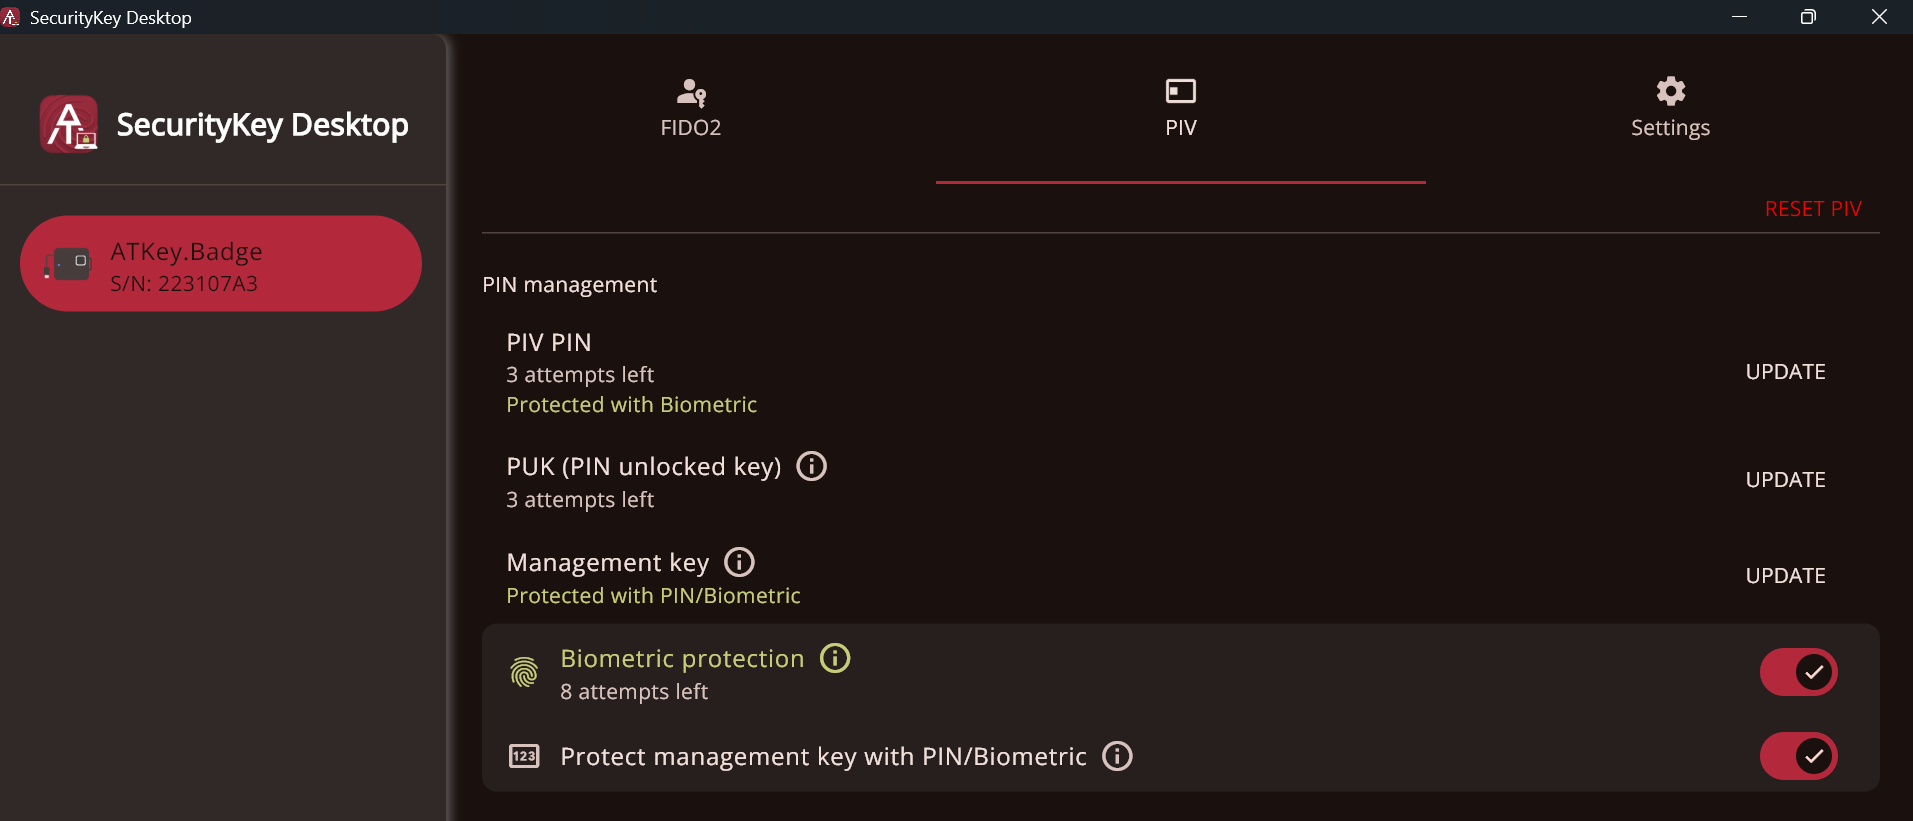
The PIV tab lets you manage PIV credentials and their protection.
You can activate Biometric protection, requiring a successful fingerprint match before letting application access your PIV credentials. Change PIN, PUK and Management key.
Furthermore, from here you can manage the 4 PIV slot available:
Slot 9a - Authentication
This is the main slot, it identifies the user with any service they are trying to login with.Slot 9c - Digital Signature
This slot is used to sign documents and files marking the user has the signerSlot 9d - Key Management
This slot is used for encryption. The key here stored is used to encrypt documents, messages, and ensure confidentiality.Slot 9e - Card Authentication
This slot is used for physical access.
Settings
Through the settings tab you can see the firmware information for each of the protocols your ATKey supports.
If you have not authenticated the user through fingerprint or PIN you can only visualize this information but after clicking on Manage at the top right and verifying your fingerprint or PIN you will be able to activate or deactivate some of the protocols.
When connecting ATKey.Card NFC or ATKey.Badge you can decide to enable or disable the PIV and the Digital Business Card functions.
For added protection you are also able to activate fingerprint protection for the Digital Business Card function. Once activated it will be required a successful fingerprint verification to exchange contacts through the Digital Business Card function.
When using ATKey.Pro, from this tab that you can prompt a Sensor calibration. The process will correct any eventual misalignment that may have happened with the fingerprint sensor of your ATKey.Pro. This procedure is recommended if you are experiencing a sudden high amount of failed fingerprint verifications for no discernible reason.